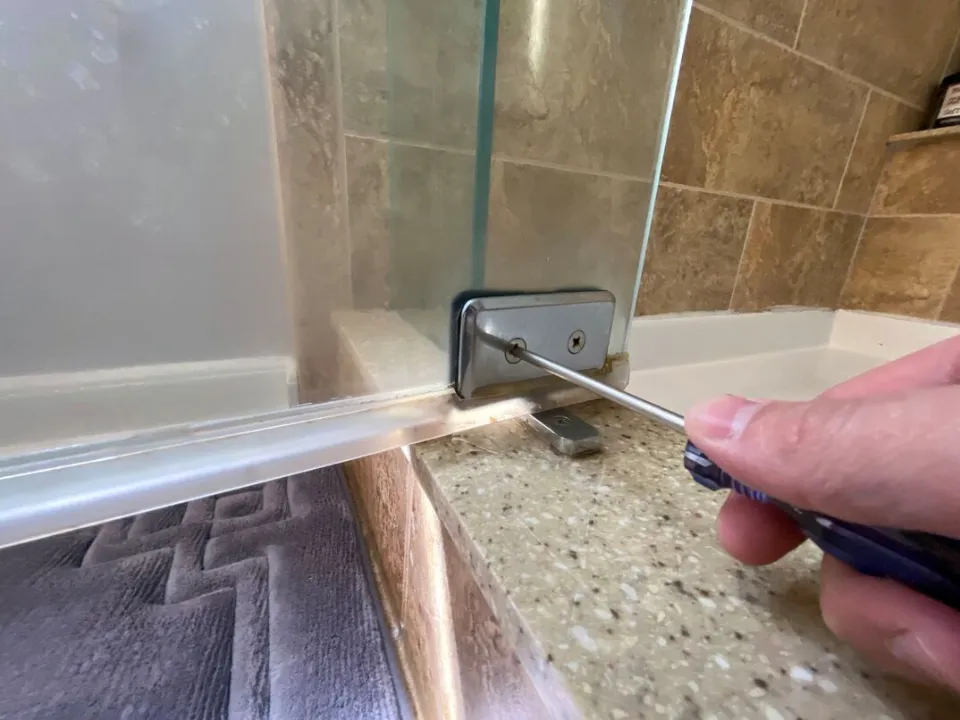
When the rollers that ride in the top rail need to be disengaged, you can occasionally just stand in the tub and lift and tilt the interior door. In other instances, a metal piece at the bottom that aids in keeping the doors in the track must first be removed. Depending on the style, this component may be on the inside or outside of the tub, but it should simply screw onto the bottom track. Remove the other door after you’ve taken out the first one.
The top rail is next. It simply rests on top of the side rails, but the installer may have caulked this joint with silicone to keep it from moving. If there is caulk, use a utility knife to cut through it while being careful not to damage the tile. Even more caution is required when working with a fiberglass tub surround.
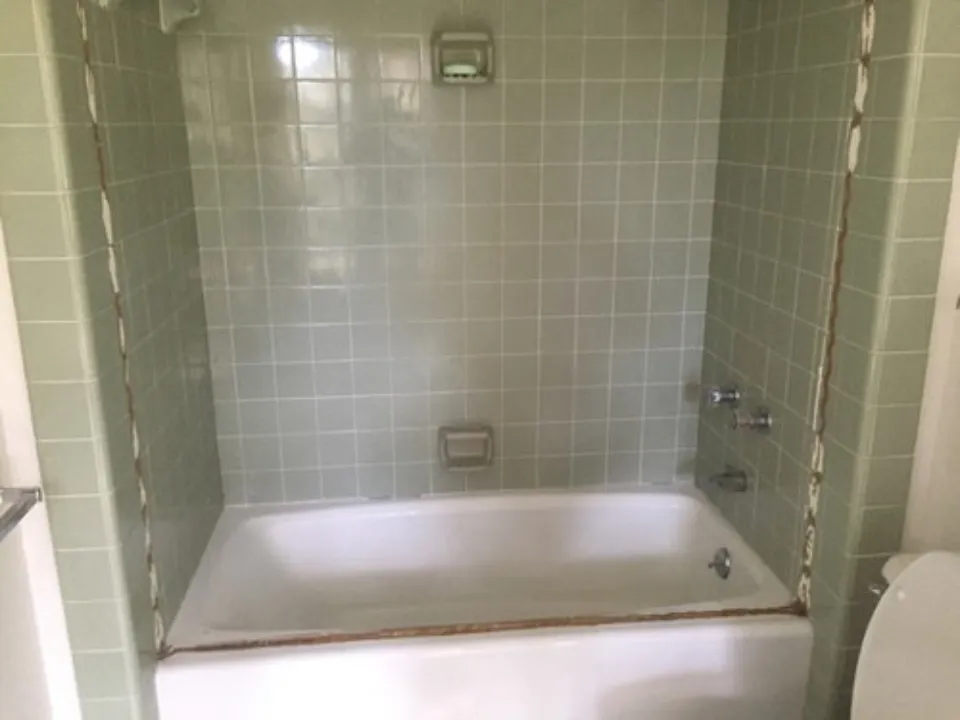
Simply lift up and set aside the rail after it has been liberated.
Next are the side rails. The only parts that are fastened with screws are these, though silicone caulk is also probably present. Cut through the caulk on both sides of the rail beginning at the top after removing the screws.
If you can squeeze a wide putty knife behind the rail after you’ve removed enough of the rail to do so, you might be able to apply enough pressure to simultaneously cut through the remaining caulk on the inside and outside of the rail. To reduce the possibility of scratching the tile, try using a plastic putty knife for this.
Use a caulk remover, such as Goo Gone caulk remover ($9.47 for a 14-ounce spray bottle at Home Depot), to soften the caulk if it appears to be too stiff to cut through. Check the label to make sure the gel remover is safe to use with the kind of surround you have before using it so that it will adhere to the vertical surface.
In addition to being safe to use on fiberglass and tile, the gel Goo Gone formula also softens silicone and acrylic caulk, according to the label. It will take at least two hours and possibly as long as seven for the cured caulk to soften enough for you to be able to cut through it since you are working with it. Wear gloves because the solvent used to remove it is petroleum-based.
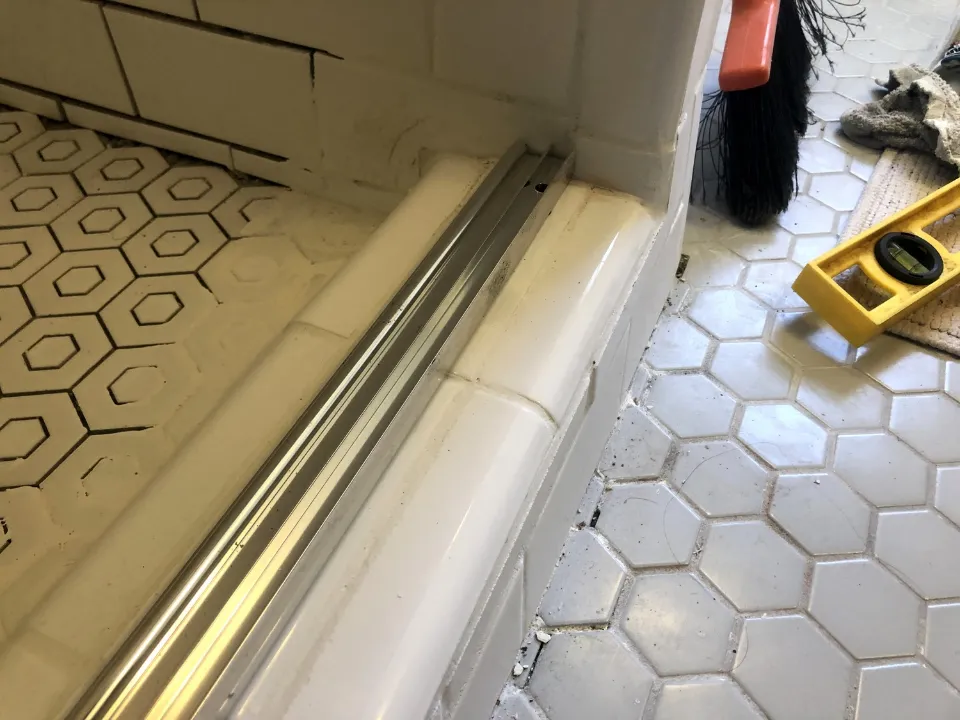
Free the bottom rail by removing the side rails first. Caulk is all that’s holding it down, but by this point, you should be adept at removing that.
Remove all the caulk smears to complete the task. Use a razor blade held as flat to the surface as you can to remove as much as you can. Use caulk remover to get rid of the last bits of caulk. Use warm, soapy water to rinse off any remaining remover.
Use a two-part filler intended for auto body holes to repair the holes. A Bondo customer service agent suggested using fiberglass filler instead of regular auto body filler because it is waterproof. Regular auto body filler is not. She did, however, say that either option would work as long as the patches were painted, which you would want to do anyhow to make the patch match the tile and protect it from cleaning agents.
If you decide to use fiberglass filler, be sure to choose a product that only contains short strands of fiberglass; you don’t want the kind that requires applying fiberglass mesh and then covering it with resin.
With a putty knife, press the resin and hardener mixture into the screw holes. Cut off the extra patch with a razor blade when it starts to slightly cure but is still rubbery. Avoid leaving smears across the tile; instead, keep the patch to the screw holes and keep it flush with the tile surface.
Read More to learn the following information about door fix!
- Why Won’t Your Garage Door Close – Reasons & 3 Ways to Close
- How to Replace a Door Frame with Simple Steps
- How to Fix Pocket Door Scratching – Perfect Solutions
- Why Put Foil On Door Knob When Alone – Is It Necessary?
- How To Fix Garage Door Cable? A Complete Guide For You
- How To Install Garage Door? (A Guide For Beginners)
- How To Fix A Door That Won’t Latch?
To make the patch as smooth as the tile, Hazelton recommends using very fine sandpaper with a 600-grit setting that has been moistened with water. Then, combine touch-up porcelain paint to achieve the closest match to the tile’s color. Small bottles of eight different colors are included in the TileFix tile and stone repair kit, along with instructions on how to mix the colors to match nearly any hue. Utilize a tiny artist’s brush to apply the paint. Additionally, this kit includes acrylic putty that you could use to fill the holes; however, even after curing, it retains some flexibility.