Your showerhead is stuck, and you want to take it off.
Most of the time, removing a showerhead doesn’t require hiring a plumber. Within minutes, you can easily unscrew it from the shower pipe.
Showerhead removal, however, can be difficult due to calcification, rust, or mineral buildup.
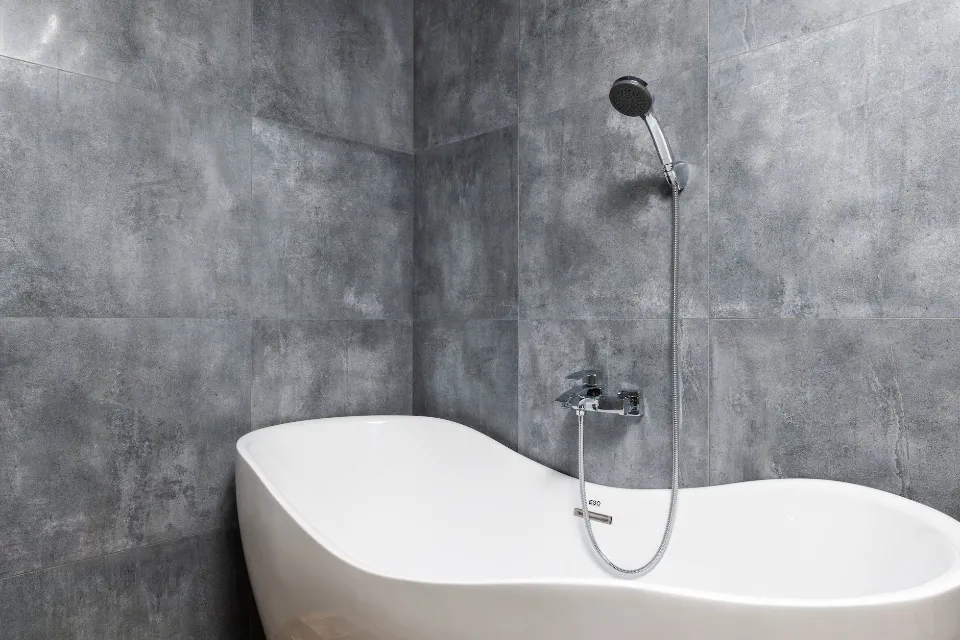
Depending on the style of your shower head, you can grasp either the shower head or the connecting nut to remove it. To unscrew and remove the old shower head, turn counterclockwise.
Here is a detailed guide on how to unstick a showerhead, clean it, and reattach or replace it so that it won’t get stuck again.
How to Remove a Stuck Showerhead?
You may need pliers, an adjustable wrench, plumber’s tape (Teflon tape), and other tools before removing a showerhead. Additionally, you’ll need a new showerhead if the old one is broken. Once you gathered these tools, follow the steps below:
Step 1: Inspect Your Showerhead
Unscrewing a well-maintained showerhead won’t cause you any problems. When attempting to remove a stubborn showerhead, look for signs of calcium buildup or rust.
Where the showerhead attaches to the shower arm, calcium buildup will manifest as a whitish ring. Rust is probably present at a connection if you see an orange or copper ring.
What happens, though, if you don’t see any mineral or rust deposits? Possibly the buildup is underneath the showerhead or it is firmly fastened.
Step 2: Switch Off the Water Valve
We advise turning off the water before removing a stuck shower head, especially if you don’t know much about plumbing.
If you accidentally break the showerhead or shower arm, turning off the water supply will prevent leaks. It additionally avoids pointless spraying.
The water valve is typically found in the basement, directly below the bathtub, in most houses. However, if you reside in a condo or apartment, check under the sink or behind the toilet.
Consider speaking with your property manager if you are unable to locate the water shut-off valve. The same water valve may occasionally be used by multiple units.
Step 3: Wrap Your Pliers
It’s simple to remove your showerhead’s screw using a standard pair of pliers. However, after covering the teeth of your pliers with plumber’s tape, you will find that they are more productive. If you don’t have tape, wrap the bolts or nuts you want to remove in cloth before using the pliers.
Wrapping your pliers will stop the teeth from scratching the plumbing nut or shower head connector and leaving metal shavings behind.
Step 4: Set Up Your Workspace
It’s a good idea to safeguard your bathtub or shower because you’ll be using a variety of tools and harsh chemicals.
Use a work blanket, towel, plastic cloth, garbage bag, or both to cover the surface of your bathtub or shower. In this manner, no damage will be done by any falling screws, chemicals, or debris.
The cover will also stop other small parts and rust shavings from going down the drain. However, you could always use a washcloth to obstruct the drain’s opening.
Step 5: Remove the Showerhead

Now that the aforementioned has been completed, it’s time for the best part: removing the stuck showerhead. With or without tools, you can complete this.
Using Tools
- Using pliers or an adjustable pipe wrench wrapped with a plumber’s tape around its teeth, grip the fixture’s connector
- Tighten the pliers or wrench around the connector and turn it clockwise to loosen the mineral deposits or rust
- Once the showerhead breaks free, turn it counterclockwise to unscrew it
- Finish the unscrewing by hand to avoid stripping the original connector
Without Using Tools
If you were unable to remove the showerhead, you might need to try a different strategy. The showerhead may not always come off easily if the rust or mineral buildup is severe. Fortunately, there are some efficient approaches to deal with this problem.
1. Use Vinegar
Because of its high levels of acidity, white vinegar is a natural cleaner that dissolves a variety of substances, including rust or buildup. It’s also safe to use around kids and animals.
You can remove the calcium buildup and rust from your clogged showerhead using a multipurpose cleaning solution. Just give the showerhead a quick vinegar soak. The corrosion will be eliminated by it.
If you have a hanging showerhead, soak it in some vinegar in a bowl or bucket. Use a plastic bag filled with vinegar and an elastic hair tie to enclose the connector on a showerhead that is mounted to a wall or ceiling.
To allow the vinegar to penetrate the entire connector, leave the showerhead in the water for the entire night. After soaking, use your hands to try to wiggle the showerhead. Use a pipe wrench if it’s a little resistant.
2. Calcium Lime Rust
Use calcium lime rust on the showerhead if the first approach doesn’t work. This substance performs the same function as vinegar. Be sure, however, to adhere to the directions provided on the product packaging.
The chemical should be applied and left for the specified amount of time. Next, remove the chemical and any rust or mineral debris with a wire brush. Try cleaning the fixture and unscrewing the showerhead from the showerhead pipe.
3. Penetrating Lubricant
Use penetrating lubricants such as Liquid Wrench and WD-40 if you’re having trouble.
- Coat the showerhead’s connector with penetrating lubricant and leave it for 2 hours
- Spray the lubricant for the second time and allow it to sit for 2 hours
- Try wiggling the connector or nut back and forth to move the lubricant around and see if it gives in
- Wrap the fixture’s connector with a leather or heavy cloth and grip it with pliers and a wrench
- Unscrew the showerhead
When using penetrating lubricants, don’t forget to protect your skin and eyes.
Step 6: Clean the Showerhead and the Pipe
Cleaning the showerhead and the pipe it is attached to is necessary after you have successfully removed the showerhead.
First, remove any tape that may still be on the connector. To remove calcium deposits and rust from the showerhead pipe threads, use a wire brush or steel sponge.
Make sure you enter the threads’ groves. By doing this, you can stop corrosion or buildup from happening when you re-attach the old or new showerhead. Use vinegar or calcium lime remover to dissolve stubborn buildups.
If you intend to reattach the showerhead that was removed, soak it in a small bowl of vinegar and let it sit there all night. Mineral stains and rust will be removed by the vinegar.
Run cold water through the showerhead the following day to remove the vinegar. Look for signs of corrosion or calcification on the showerhead.
If you see any, spray the showerhead with calcium lime rust and let it sit for the designated amount of time. Then, using a toothbrush or wire brush, burst off the product.
Step 7: Replace Or Re-Attach the Showerhead
The replacement of the showerhead with a new one or the reinstatement of the original showerhead is the final step. The steps below can help you complete this process:
- Wrap the connector threads with Teflon tape
To stop leaks, wrap plumber’s tape around the connecting shower pipe. Teflon tape should be applied in two to three layers, clockwise, around the shower arm’s thread. Make sure to press the tape firmly in the threads’ grooves.
- Attach Your Showerhead
Install your showerhead, whether it is old or new, on the showerhead arm by screwing it tightly in clockwise rotation.
Attach the hose’s one end to the showerhead base and manually tighten it if you want to install a hand-held showerhead. Attach the new showerhead to the hose’s other end.
- Turn On the Water Supply
Turn on the water supply and look for leaks after you’ve finished each step. If you notice any connection leaks, you should use an adjustable wrench or pliers to tighten the fixture’s connector until the leak is eliminated.
Tape the shower arm if necessary with plumber’s tape. When tightening, cover the finish of the showerhead with a thick cloth as well.
Conclusion
Mineral buildup and rust are the main causes of a stuck showerhead, as was previously shown. However, this does not preclude you from removing your showerhead. You just need to work harder than you normally do, that’s all it means.
If you stick to these instructions, you can easily remove your stuck showerhead and replace it with a new one.
That’s all for today!