Cooling a room in your house quickly is made possible by portable air conditioners. However, they frequently yield disappointing results—particularly when the weather is extremely hot.
You can set your portable air conditioner at a temperature that is lower than your room’s temperature to make it colder. By switching from auto mode to cooler mode on your air conditioner, you can achieve this.
In this article, I’ll discuss some pointers and techniques for enhancing the cooling of your portable air conditioner. In addition, I’ll discuss the ideal installation procedures you ought to use when assembling your portable air conditioner.
How to Make Your Portable AC Colder?
1. Clean the Air Filters

The first thing you should do if your portable AC isn’t cold enough is clean its air filters.
The airflow through your portable air conditioner will be impeded by dirty air filters, reducing cooling effectiveness.
Air filters for the intake of conditioned air and the intake of exhaust air are typically present on portable air conditioners.
Most portable air conditioners have thin plastic mesh air filters. These air filters can be cleaned and reused, so you can rinse them with water when they get soiled.
Read More: How To Vent A Portable Air Conditioner Without A Window?
To clean the air filters on your portable AC, follow these steps:
- Your portable air conditioner should be unplugged. Before working on your portable AC, make sure it is powered off and unplugged.
- Remove the air filters’ plastic grilles. The plastic grille that covers the air filters should be detachable. In order to access the air filters, remove the plastic grilles. You can clean the plastic grilles with water if they are dirty.
- Air filters should be removed. Look out for any accumulated dust as you’re removing the air filters. Take care to prevent the dust from falling off the filter or getting blown around the room.
- Refresh the air filters. Plastic mesh filters can be found on the majority of portable air conditioners. You can simply rinse them out with water if your portable AC has this kind of filter.
When rinsing out your air filter, spray water on the filter from the inside out. Why do I say from the inside out? You’ll want to spray water on the side that faces inside the AC. This makes it so that you’re pushing the dust off of the filter (instead of trying to push the dust through the filter). - The air filters and grilles should be reinstalled. When dry, reinstall the air filters and grilles in your portable air conditioner.
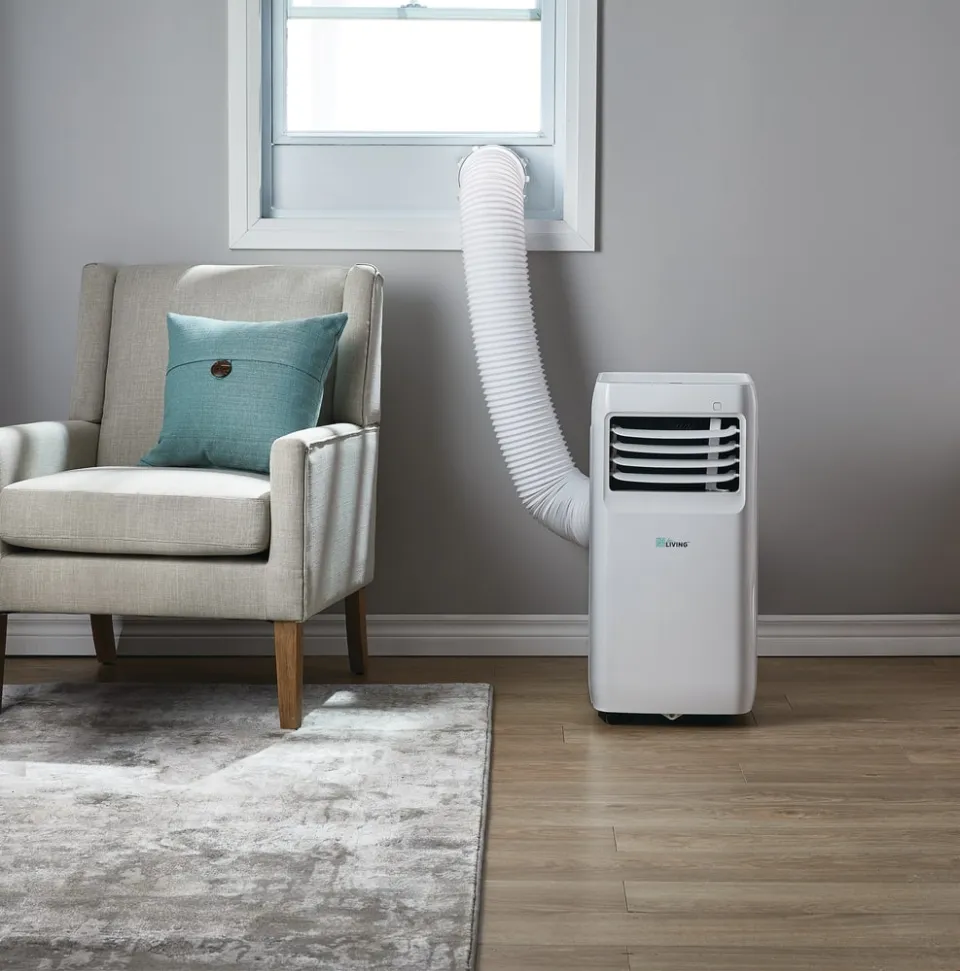
2. Straighten and Shorten the Exhaust Air Hose

All that hot air must be moved somewhere when a portable air conditioner cools your room; typically outside. The exhaust hose is useful in this situation.
All of the hot air in your home is directed outside by the exhaust hose.
Similar to dryer vent hoses, the majority of portable AC exhaust hoses are adjustable and collapsible.
The exhaust air will be prevented from leaving your house, however, if the exhaust hose is kinked in any way.
The exhaust hose should also be as brief as possible. The airflow will encounter resistance if the exhaust hose is long. Decide on a short, direct route for the hot exhaust air to take in order to get it outside of your house.
One final (and crucial!) point.) thing to check is that the discharge outside of your home isn’t blocked. The airflow outside some homes’ windows may be obstructed by objects or plants. In order to ensure that air can flow freely outside of your home, check your exhaust discharge and, if necessary, move the discharge vent.
3. Seal Up All Exhaust Air Leaks

If the exhaust hose has any air leaks, the hot air will immediately return to your house. But the majority of exhaust air leaks don’t happen in the exhaust hose itself; instead, they happen at the connections of the exhaust hose.
You need to be concerned about two exhaust hose connections: one at the portable AC and one at the exhaust vent, which is typically a window.
The window connection is the first thing you should check. Make sure the exhaust hose is fastened to the vent and that the area around the connection is tight.
The connection at the portable AC should then be examined. The exhaust hose connection on the majority of portable air conditioners should be tight. But (especially in older units) there could still be a few air leaks.
Apply aluminum foil tape around the openings where the exhaust hose connects to the vent and the AC to seal off any air leaks.
Foil tape can also be used to seal air leaks in the exhaust hose itself.
Read More: How Long Can You Run A Portable Air Conditioner Continuously?
4. Close All Doors and Windows

Minimizing the amount of heat in your space will also help your portable AC work more efficiently.
The simplest way to reduce the amount of heat in your space is to close all the doors and windows.
Let me put it this way: If warm air is constantly coming in through the door, how will your room ever be able to cool down?
The amount of untreated air that enters your space is reduced by closing all the doors and windows.
In essence, you want to close off your room as much as possible. Close off all the gaps around your doors to go even further, but that’s typically overkill.
5. Block All Sunlight from Entering the Room

Even with all of your windows closed, sunlight can still heat up your room significantly. In order to prevent any sunlight from entering your room, it is crucial to do so.
Therefore, to ensure that the heat load from the sunlight is reduced, close all of your blinds and curtains when using your portable AC.
You can cover your windows with a sheet to keep the light out if they don’t have blinds or curtains. However, because sheets are not very effective at blocking out sunlight, I would only use them briefly.
Installing blackout curtains over your windows is highly advised because they are excellent at keeping the sun out.
6. Provide a Clear Air Path for the AC

If your portable AC doesn’t have “room to breathe” then it won’t do a good job at cooling your room.
Make sure there is enough space in front and behind your portable air conditioner when choosing a location to set it up.
I advise leaving AT LEAST 1 foot of space behind the portable air conditioner so that both air intakes can function properly.
Your room’s center should be directly in front of the path that your portable AC’s cold air discharge takes to exit. In other words, there shouldn’t be anything in the way that prevents your portable AC from discharging cold air.
You should move your AC to a different location if there are any airflow restrictions in the area.
7. Turn on the Air Conditioner Before You Need It

Before your workforce arrives or you intend to use a room, turn on the air conditioner. To maintain everyone’s comfort and maximize cooling, that is the reason. The amount of energy needed to cool the area will be reduced if you turn on your portable air conditioner in the morning when it is cooler outside. Whenever possible, turn on the air conditioning before the room becomes like a furnace.
Best Way to Set Up a Portable Air Conditioner
A portable air conditioner is very easy to set up, and you can do it by yourself with no problem. But if you’re unsure of how to proceed, you can use this quick guide.
- Locate a place that is convenient and near the window so that your air conditioner can access the airflow that has been interrupted. Additionally, positioning your portable air conditioner nearer a window will increase the efficiency of your AC system because warm air will be vented outside as opposed to inside the room.
- Make sure the adapter kit for the portable air conditioner fits into the window perfectly. Nevertheless, this shouldn’t be a problem because the majority of adapter kits are made to perfectly fit into the typical window. The window adapter should be cut if your adapter kit is larger than it in order for the ac adapter kit to fit. Furthermore, you should fill the space with plexiglass if the window adapter is larger than the air conditioner’s adapter kit.
- As soon as you are certain that your portable adapter kit perfectly fits the dimensions of your window, you can proceed to screw it in place.
- Make sure the window adapter and ventilation hose fit together perfectly before connecting them. Cover any gaps with duct tape and the meeting place if they don’t fit together perfectly. The AC unit should then be connected to the ventilation hose’s other end, and any exposed ends should be taped shut.
- If your portable AC unit has a drainage hose, connect it to your AC unit and the drainage point on the other end. Make sure they fit snugly; if not, tape any gaps with duct tape to prevent liquid from dripping onto the floor.
- Your portable air conditioner can be plugged into an outlet and turned on after all attachments have been connected.
Final Thoughts
Utilizing the above advice will make the majority of portable air conditioners cool more efficiently because most of them operate similarly.
You should get in touch with a cooling system expert if none of the tips seem to work despite trying the troubleshooting steps.
If you don’t have any experience with portable air conditioners, it’s best to let a pro handle the investigation to determine why your unit isn’t blowing air or creating a cool environment.
FAQs
How to Fix Portable Air Conditioner Not Cooling?
Examine the electrical plug for the air conditioner. There should be a test and reset button for a built-in breaker: press the “test” button to trip the breaker, then push firmly on the reset button and try to turn the air conditioner on again.
Why is My AC Not Blowing as Cold?
The refrigerant could be the issue if your central air conditioner isn’t blowing cold air. The system might be low on refrigerant and require more to be added. A leak is the most likely reason for this. A leak can lead to other problems inside the house in addition to preventing the AC system from cooling properly.