An ice maker is one of the most essential appliances in the modern home, and even though it may seem like a pointless purchase, it’s important to think about how much ice you use frequently.
The Portable Ice Maker can be cleaned with a soft cloth and some warm, soapy water, or you can use two tablespoons of baking soda dissolved in a gallon of warm water.
We’ll go over some quick and easy ways to clean a portable ice maker using basic household items because, like other appliances, an ice maker needs to be cleaned frequently to maintain its efficiency.
How to Clean An Ice Machine?
The cleaning techniques suggested by various manufacturers may vary. Because of this, we advise consulting your user manual before cleaning your ice maker.

1. Turn Off Or Unplug Your Ice Machine and Drain the Water
Make sure the appliance is off or unplugged before starting to clean your ice maker or the ice maker in your freezer. Watch for any ice to fall into the storage bin for 5 to 10 minutes.
Drain any remaining water from the appliance after removing the ice. This can be done by taking off the drain cap on the majority of ice makers. In order to ensure that all water has been drained, let the unit sit for 5 minutes before replacing the drain cap.
2. Remove and Clean Removable Ice Machine Parts
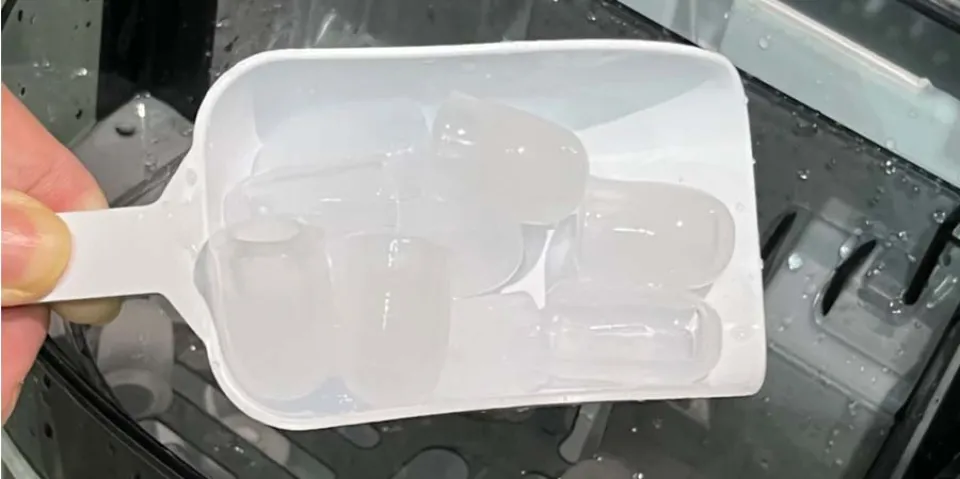
The parts of your ice maker that come into contact with the ice should be cleaned frequently. Remove the ice scoop or cup and any other containers from your ice maker, if there are any. All items should be hand washed in warm, soapy water, completely rinsed, and then given plenty of time to dry. Plastic parts shouldn’t be washed in the dishwasher.
Advice: Your ice basket may become stuck occasionally due to the buildup and fusion of old ice. Allow some of the ice to melt, and if necessary, use warm water. As the ice melts, you can also use a spoon to gently pry the ice bucket away from its placement.
3. Clean the Interior of the Ice Machine
After the buckets and other components have been removed, spend some time cleaning the ice maker’s interior. (Remove any food that is currently inside the refrigerator or freezer before cleaning it.) Use a soft cloth and some warm, soapy water, or two tablespoons of baking soda dissolved in a gallon of warm water. Use a soft, damp cloth to rinse the interior surfaces after cleaning them. A soft, dry towel should then be used to clean the interior. As soon as they are fully dry, replace the removed interior components.

Advice: Use a soft-bristled toothbrush or a paste made of baking soda and water to remove any hard water mineral buildup you find inside your ice maker. Use of harsh cleaning agents, bristly brushes, or scrapers with pointed edges may harm the interior’s plastic lining.
4. Change Your Ice Machine’s Water Filter
The water filters in a lot of refrigerators, freezers, and ice makers need to be changed on occasion. If your appliance has a water filter, cleaning the ice maker is an excellent chance to swap out the old filter for a new one.
If you’re cleaning the ice maker in your refrigerator freezer, turn the power back on and start the ice maker a few times to let the newly filtered water flow through it. Each time, throw away the ice. Follow the directions below if using a stand-alone ice maker.

5. Pour the Cleaning Solution into the Ice Machine Water Pan Or Reservoir
Simply pour the contents of the bottle into the water pan or reservoir of your appliance if you’re using ice machine cleaner, and then add 32 ounces of water. Another option is to clean your ice maker with vinegar if you don’t have ice maker cleaner at home. Pour a solution containing 10 parts water and 1 part distilled white vinegar into the water reservoir.
6. Run An Ice Making Or Cleaning Cycle
To get the cleaning solution moving through the machine, run at least two cycles. (Use the Clean cycle on your ice maker instead if it has one.) The ice from these batches should be thrown away, and you should see if there is any cleaning agent left in the water pan or reservoir. If so, run more cycles to clean and circulate through the appliance.
Refill the water pan with fresh water once all of the cleaning solution has been used, then screw the drain cap firmly in place.
7. Wipe Down the Ice Machine Exterior

Warm water, mild soap, and detergent should be used to clean exterior enamel surfaces and gaskets. Spray stainless steel cleaning spray onto a clean microfiber cloth and wipe exterior stainless steel ice machine surfaces while following the grain of the metal.
Remember not to clean surfaces made of stainless steel with ammonia or citrus-based cleaners. Avoid using scouring pads, paper towels, newsprint, steel wool, or abrasive cleaners that contain liquid or powder on stainless steel surfaces.
You can now enjoy a clean appliance and delicious ice once your ice maker has been thoroughly rinsed and the ice from cleaning batches has been thrown away. Repeat this process every nine months or sooner if your clean indicator light turns yellow or you notice your ice tasting “off.”
Why Should You Clean Your Ice Maker
The best performance from your ice maker depends on regular maintenance and periodic cleaning, just like with most other devices. Not cleaning up your ice maker regularly may result in the build-up of undesirable substances such as limescale, mineral deposits, mold, and other such impurities. applies equally to all types of ice makers, whether they are for domestic or commercial use and produce flake, sonic, or cube ice.
Your ice may eventually develop a cloudy appearance, melt quickly, or emit an unpleasant odor as a result of all of these impurities accumulating. When your portable ice maker starts producing ice that meets these requirements, you must research how to clean a portable ice maker.

How Often Should a Portable Ice Maker Be Cleaned?
The answer to this question largely depends on how frequently you use your ice maker, but it’s generally advised that you clean it once a month, or even less frequently if you use it frequently.
The maximum frequency at which you should clean your ice maker is once every three to six months, as delaying the cleaning process beyond that point can result in the accumulation of the dirt and grime we’ve already discussed. If the quality of your ice starts to deteriorate, such as if it starts to smell bad or looks cloudy, you can also try cleaning your ice maker. Here is my in-depth guide to cleaning an ice maker with a visible slime and mold buildup.
How to Maintain Your Portable Ice Maker?
Let’s look at ways to prevent grime buildup in your ice maker so it doesn’t happen as frequently and quickly and so it keeps working at its best, keeping in mind that prevention is always preferable to treatment.
1. Unplug the Ice Maker If It is Not in Use

The longevity of your ice maker is greatly affected by this, even though it might seem like a no-brainer. Switching the ice maker off and unplugging it can help maintain cleanliness if you’re going to be gone for a while, as keeping it plugged in serves no purpose whatsoever.
By wiping the interior of the ice maker with a dry cloth, you can make sure that moisture is kept at bay, preventing mold from growing there.
2. Clean the Portable Ice Maker Regularly

Even though the aforementioned ice maker cleaning procedures may take some time, you are not required to follow them step-by-step every time you want to clean your ice maker.
Limescale and mold can be kept at bay by simply wiping the interior of the ice maker with a damp dishcloth. To prevent overheating, the majority of portable ice makers use air-cooled mechanisms. In order to keep the mechanism operating perfectly, you must perform periodic deep cleaning. You won’t need to go through the laborious process of disassembling your ice maker repeatedly if you carry out this once a week.
3. Wash the Ice Storage Basket

Your ice maker’s ice storage basket is where you store all of your ice. It follows naturally that you must always clean your ice storage basket in order to stop impurities from being transferred on to your ice since your ice is delivered to it from the ice maker.
All you need to do is scrub it with a mild cleaning solution and warm water, just like you would when cleaning the entire ice maker.
4. Don’t Use Any Harsh Chemicals

It can be extremely harmful to the ice maker and to your health in the long run to use harsh chemicals on it. Using abrasive chemicals on the interior of the ice maker is not a good idea because they can easily affect the quality of the ice or even boiling water, which can eat away at the plastic used in the ice maker.
5. Descale Your Portable Ice Maker

Hard water buildup in your ice maker can result in the accumulation of scales in its internal components, which can be dangerous for its effective operation.
The operation of the ice maker can be significantly impacted by the accumulation of calcium deposits, or scales. This can be easily avoided by using methods like using a readily available descaler or a vinegar solution that reacts with the calcium deposit and dissolves the same, effectively cleaning out the formation of scales.
Conclusion
An ice maker is incredibly useful for daily use, but it is obvious that in order for it to function at its best, your portable ice maker needs to be cleaned and maintained. Fortunately, the procedures to do this are very simple. You can have an ongoing supply of ice for as long as you need with the right tools and some caution!
FAQs
How Often Do You Need to Clean a Portable Ice Maker?
If you live in a region with hard water or high humidity, experts advise cleaning ice machines more frequently, at least every nine months.
Can I Run Bleach through My Portable Ice Maker?
A mixture of water and chlorine bleach (5.25% sodium hypochlorite) should be used to sanitize the system. Any commercial disinfectant that has been approved for use with ice makers is acceptable.
Can You Use Vinegar to Clean Portable Ice Maker?
A different option is to clean your ice maker with vinegar if you don’t have an ice machine cleaner at home. Pour into the water reservoir a solution made up of 10 parts water and 1 part distilled white vinegar.