In addition to being unsightly, stained, dirty, and aged bathroom tile grout can make it more difficult to sell your house. Despite your best efforts to clean the grout, staining can occasionally still happen, giving the appearance of dirty tile.
How do you redo a shower wall’s grout? Removing all of the outdated, moldy, and dirty grout and caulk is the first step in regrouting a shower.
Regrouting a shower wall is simple if you have the right equipment and follow the right procedures. You’ll learn how to regrout a shower wall in this article by following the step-by-step instructions as we take a closer look.
Read More: 10 Best Caulk For Shower
Why Did You Need to Regrout Your Shower Wall?
Let’s look at the purpose of redoing the grouting on a shower wall before learning the best way to do it.
Despite the fact that grout does not have the same qualities as tiles, shower walls are typically made of tiles. Grout inevitably deteriorates. As a result, periodically regrouting the wall can both improve its appearance and help you prevent new issues.
Grout can crumble if it is not taken care of, which could lead to fungus growing on your wall for the first time. Learn how to regrout and seal a shower wall using the information in this article to avoid burning a huge hole in your wallet and restore the original appearance of your shower wall.
Prepare Your Bathroom Beforehand
Before you begin to learn how to regrout a shower recess, make sure you have certain things and arrange your bathroom products in a manner that will be suitable for you to perform the procedure. Before rerouting showers, you should consider the following a few things.
- Ensure that the grout on your shower wall is thoroughly cleaned if it has fungus. Your regrouting could become ineffective if you don’t do this.
- Remove any heavy water stains you find in addition to this. Razor blades or nylon pads can be used for this. By doing this, you can maintain a spotless, clean wall.
- Last but not least, using a good tile sealant can help keep the grout and tiles white.
What You’ll Need?
You’ll need to be prepared for a rainy day with a lot of information on how to regrout and seal your shower.
1. Some items, such as a grouter, might not be found in homes, so you might need to purchase them. So, in general, you’ll need a trowel, a grout spreader, pre-mixed or powdered grout, and a grouter.
2. There are a few items that are accessible at home. For instance, you already have clean rags and sponges at home; they are not necessary to buy.
3. For added security when working with tiles and their parts, a dust mask should always be worn.
How to Regrout a Shower Wall?
How to easily regrout a shower’s wall and floor is covered in this section.
Getting Rid of the Old Grout
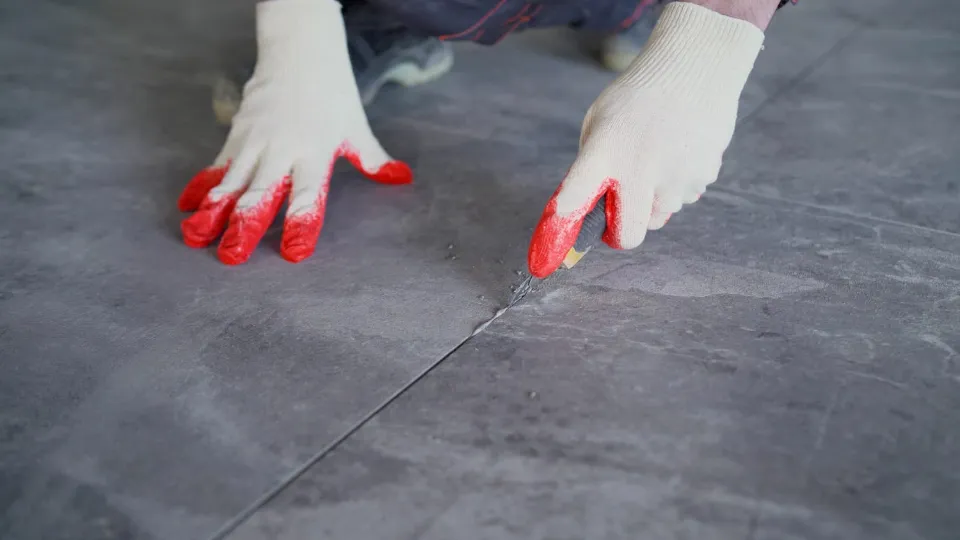
The question of how to regrout shower tile without removing the old grout may come up from some users. It is strongly advised against doing this even though it is possible. The old grout should never be used again before the new grout is applied. In order to remove the old grout, users can use a rake. But be careful not to harm any tiles in the process. Beginning with the horizontal joints, work your way up to the vertical ones before removing the grout. You are now prepared to apply the new grout after finishing.
Creating the Grout Mixture
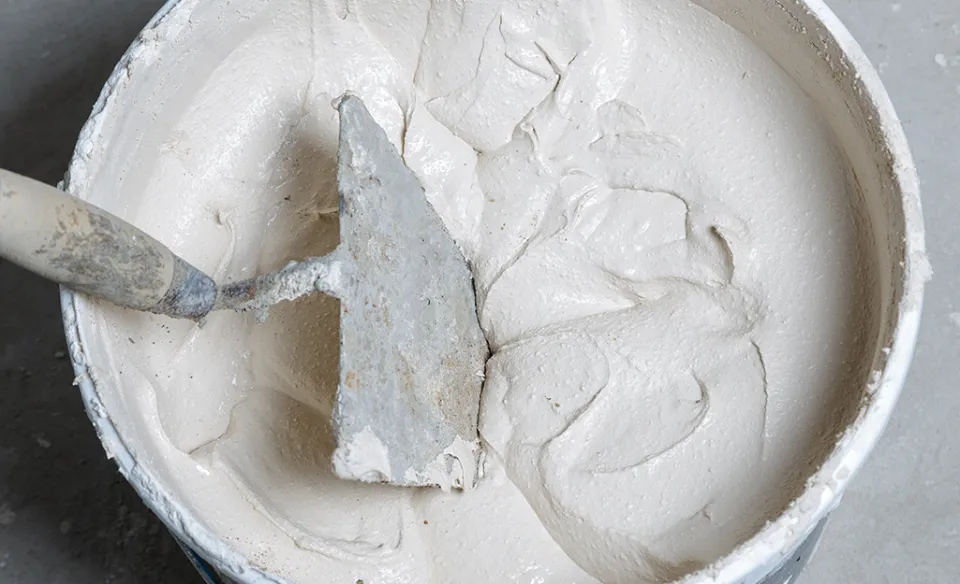
Users must mix grout by adding water after it is purchased as a powder. Additionally, you can buy grout that has already been mixed and is prepared for use. If you’re planning to regrout tiles, make sure the mixture you create will cover the area you want to cover.
Applying the Grout

Start by applying a thin layer of grout to the surface of the shower tiles with the trowel in order to regrout them. Spread the grout using upward and protracted diagonal strokes with a grout spreader. Work it into the joints and between the tiles. Verify that the grout is applied to all of the joints. Remember to move quickly as the grout will start to harden soon; another important point.
Removing Excess Grout
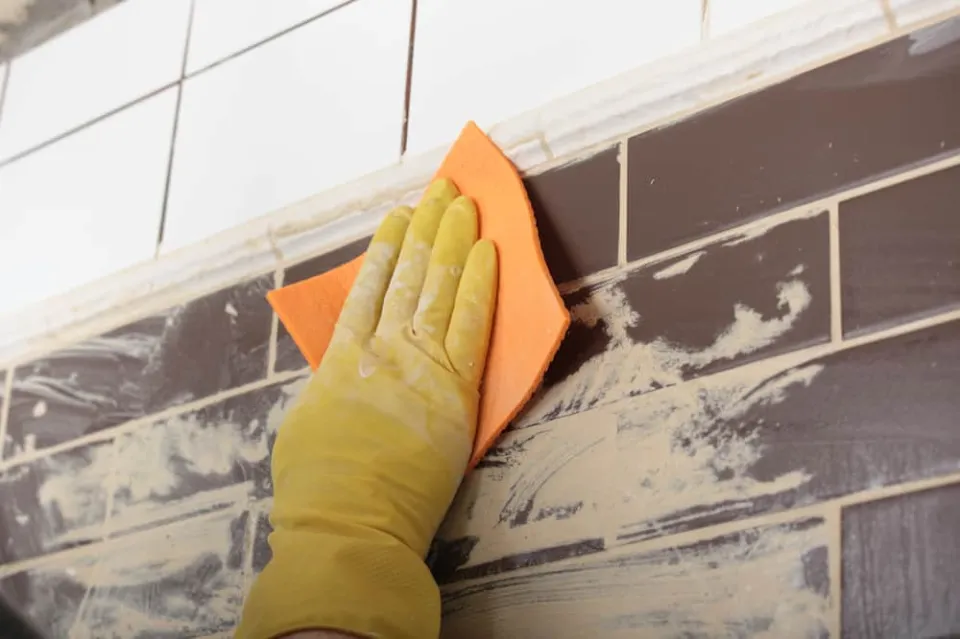
Removing the excess grout is necessary after using the tools to regrout showers. Don’t drag any grout off the tiles when using a damp sponge.
Using a Grout Shaper to Finish Off the Joints
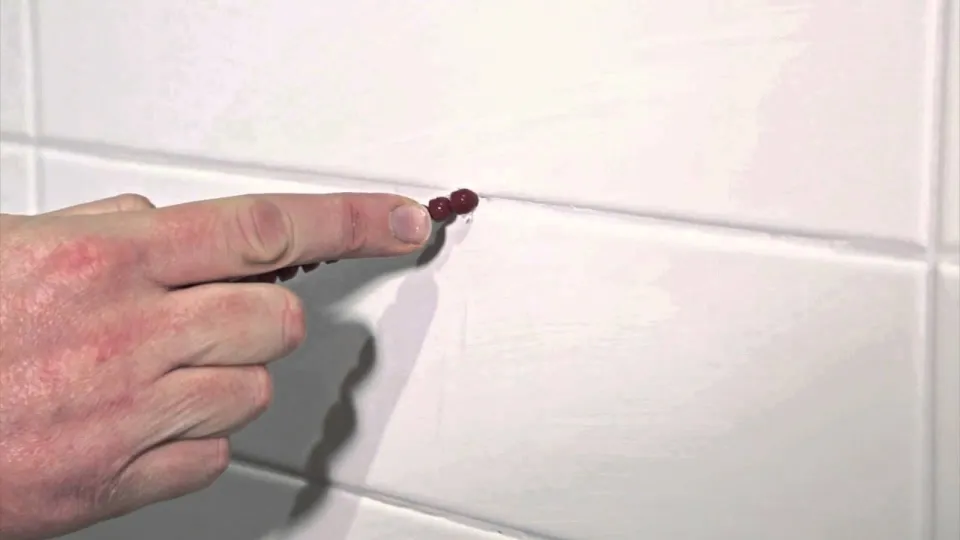
For a neat finish, use a grout shaper to complete the joints once the grout has slightly hardened. Simply pull the tool along the joints to regrout, if necessary. If any gaps do develop in the joints, all you have to do is press a little more grout in with your finger. For rerouting shower floor corners, users can employ the same procedure.
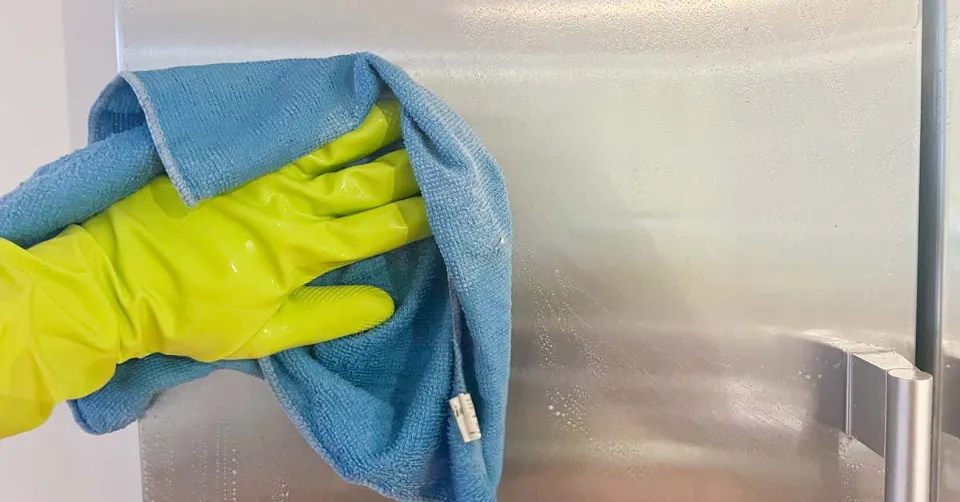
Polishing With a Soft Cloth
Finally, use a soft, clean cloth to polish the tiles to complete the bathroom regrouting process. This is due to the fact that as the grout dries, the entire process will leave a powdery film on the tiles.
How Often Should You Regrout a Shower?
Depending on your living situation and how filthy your shower wall has become, you may need to redo the grout in your bathroom every year or at least every three years to keep it up to par. This not only prevents dirt from building up into bad patches, but it also ensures that drains won’t become clogged as a result of the accumulation of debris in the grout lines.
Is It Better to Clean Grout Or Regrout?
Depending on how well the current grout is maintained, it may be preferable to grout it rather than regrout. If the grout lines are in good shape, one may choose to have them professionally cleaned or perform a do-it-yourself cleaning using a grout-cleaning tool and specialized products.
Regrouting might be a better choice, though, if the grout is stained, chipped, cracked, or otherwise damaged. To achieve a more aesthetically pleasing finish that lasts longer, regrouting entails completely removing all of the old grout and replacing it with fresh material.
Conclusion
The steps for re-grouting a shower wall are now clear to you. A shower wall that has been regrouted will look nicer, resist the growth of mold and mildew, and generally last longer. If you want to cut costs, you can do it yourself. You can restore the appearance of the shower wall and floor by regrouting the shower walls with the right care and instructions.
FAQs
Can You Put New Grout on Top of Old Grout?
The old grout can be immediately covered with new grout. Simply use a grout removal tool to complete this. Strike out the old grout using the tool, making sure that the depth is at least 2mm, or roughly the thickness of two pennies stacked on top of one another.
Do I Have to Remove All Old Grout Before Regrouting?
The majority of the grout might not need to be removed. In some cases, it might be possible to apply fresh grout on top of old, existing grout. However, it is preferable to remove the existing grout before adding new grout in cases where it has significantly deteriorated through crumbling or grown excessively dirty.
Is It Easy to Regrout a Shower?
It may seem difficult, but rerouting a shower or tub stall is really just tedious labor. Even someone who has never grouted tile before can complete a complete shower regrout in about a day thanks to how straightforward the process is.